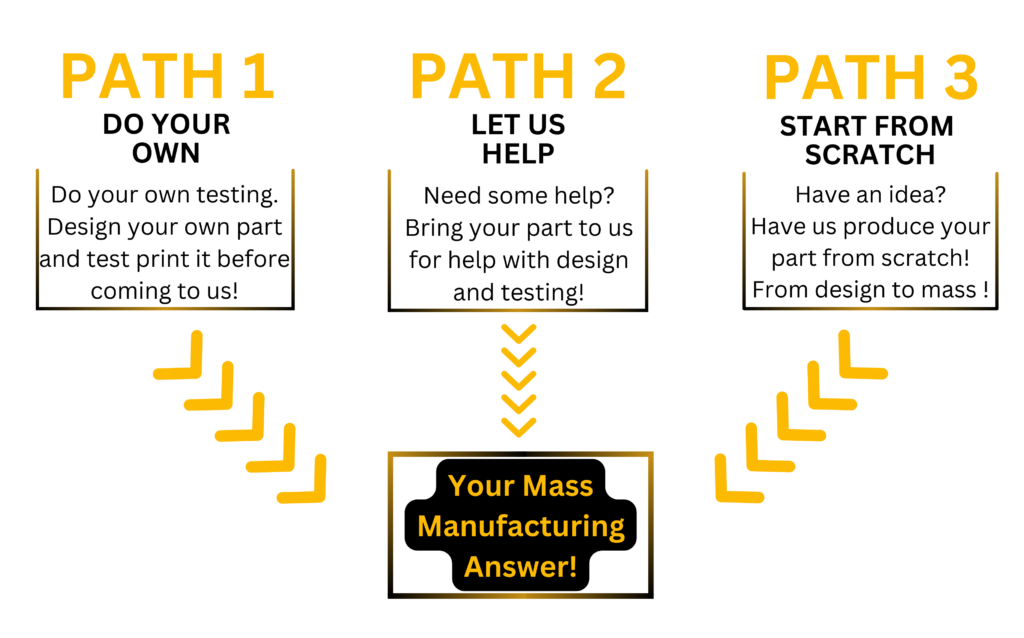
DO YOUR OWN
This path is designed to equip you with any and all resources you need to prototype then test in house! This path will help you 3D print your product with the exact material and process that we use! By the end of this path, you’re already 95% ready for mass production. All that’s left is to send us your part, we’ll give you feedback, and you decide how many you want!
Path 1
Step #1
Purchase and Set Up Equipment!
1.1 FDM (Optional) - Under 2k$
FDM or filament printers, are many times the very first step. Any FDM printer will be fine. We have a few here that work well but use what you have. These printers offer great quality and and speed. FDM printing is not as messy as resin printing so many times people do general design testing with these machines. FDM prototypes will get you up to 50% the way to mass production but is optional.
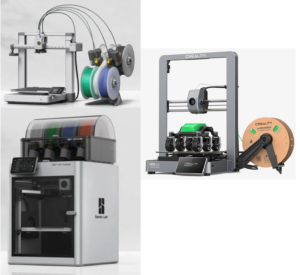
FDM printers
All the manufacturers have info on their sites or you can go to Ultimate 3D Printing Store to find out more.
- Bambu Lab X1-Carbon
- Bambu Lab A1
- Ender-3 V3
Build Volume (W*D*H): 256 × 256 × 256 mm³
Nozzle: 0.4 mm Hardened Steel Included
Hotend: All-Metal
Max Hot End Temperature: 300 ℃
Filament Diameter: 1.75 mm
Supported Filament: PLA, PETG, TPU, ABS, ASA, PVA, PET
Ideal for PA, PC, Carbon/ Glass Fiber Reinforced Polymer
Build Plate Surface: Bambu Textured PEI Plate / Bambu Cool Plate (Pre-installed, Random, Both compatible with Micro Lidar)
Max Build Plate Temperature: 110℃@220V, 120℃@110V
Max Speed of Tool Head: 500 mm/s
Max Acceleration of Tool Head: 20 m/s²
Physical Dimensions: 389 × 389 × 457 mm, Net weight 14.13 kg, Gross weight 18 kg
Electrical Requirements: 100-240 VAC, 50/60 Hz, 1000W@220V, 350W@110V
This printer has revolutionized the FDM printer market. It prints very fast and is reliable. The color option is fun but not needed for what we will be mass producing for you.
Build Volume (W*D*H): 256 x 256 x 256 mm³
Hot End: All-Metal
Nozzle: Stainless Steel
Max Hot End Temperature: 300 °C
Nozzle Diameter: 0.4 mm (Included)
0.2 mm, 0.6 mm, 0.8 mm
Build Plate: Bambu Textured PEI Plate (Included)
Bambu High Temperature Plate (Smooth PEI)
Bambu Cool Plate
Max Build Plate Temperature: 100°C
Max Speed of Tool Head: 500mm/s
Max Acceleration of Tool Head: 10m/s²
Supported Filament: ABS, ASA, PC, PA, PET,
Carbon/Glass Fiber Reinforced Polymer
Sensors: Chambering Monitoring Camera, Filament Run Out Sensor, Filament Odometry, Power Loss Recover, Filament Tangle Sensor.
Physical Dimensions: A1 : 385*410*430 mm³ , Package size : 552*532*320 mm³ , Net weight 8.3 kg , Gross weight 11.7 kg
A1 Combo : Package size 546*536*420 mm³ , Gross weight (AMS lite included) 14.3 kg
This is a less expensive option usually under $500. Does not have an enclosure but most times is not needed. Again the color is fun for some things but not needed for what we do.
Build Volume: 220*220*250mm
Input Shaping: Yes (G-sensor included)
Product Dimensions: 358*374*498mm
Leveling Mode: Auto Leveling
Package Dimensions: 541*418*245mm
Display Screen: 4.3″ HD color touch screen
Net Weight: 7.83kg
Mainboard: 32-bit
Printing Speed: ≤600mm/s
Connectivity: WiFi
Acceleration: ≤20000mm/s²
Printable File Format: G-code
Printing Accuracy ±0.2mm
Power Loss Recovery: Yes
Layer Height: 0.1-0.35mm
Runout Sensor: Yes
Filament Diameter: 1.75mm
AI Camera: Optional
File Transfer: USB drive / WLAN / Creality Cloud
Rated Voltage: 100-120V~, 200-240V~, 50/60Hz
Nozzle Diameter: 0.4mm
Rated Power: 350W
Build Surface: PEI flexible build plate
Slicing Software: Creality Print
Nozzle Kit: Quick-swap nozzle (hardened steel tip) integrated with heat-break
File Formats for Slicing: STL, OBJ, 3MF
Extruder: New high-speed direct drive extruder
Supported Filaments: PLA, TPU, PETG, ABS, PLA-CF,
PETG-CF, CR-carbon
Nozzle Temperature: ≤300°C
Heatbed Temperature:≤110°C
The is the most popular 3D printer as of today and the least expensive. It does not have many of the extra features the Bamboo printers have, but it does the trick.
1.2 Resin Basic 3K$-10K$ Option
After you get 50% there with FDM you can print your part in resin. Resin prints give much better resolution than FDM and stronger parts but can be a bigger mess. New materials have made this option viable for durable and industrial parts. Follow the manufacturers recommendations when using any printer or equipment. After printing in resin, you have completed 95% of your mass production project.
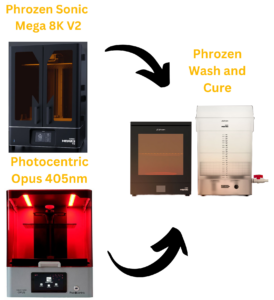
Recommended printers/wash/cure
Where to get help about these machines– All the manufacturers have info on their sites or you can go to Ultimate 3D Printing Store or EXBuild to purchase.
- Phrozen Sonic Mega 8K V2 Specs
- Photocentric Liquid Crystal Opus Specs
- Alternative Cheaper Printer (Phrozen Sonic Mini 8K S)
- Wash and Cure Post Processing
Sonic Mega 8K V2 Specs
System: Phrozen OS
Operation: Touch Panel
Slicer Software: CHITUBOX
Connectivity: USB
Design: Technology Resin 3D Printer – LCD Type
Light Source: 405nm
Release Film: ACF Film
XY Resolution: 43 µm
Layer Thickness: 0.01-0.30 mm
Average Printing Speed: 400 layers/hr
Power Requirement: AC100-240V;50-60Hz
System Power: Max 240 W
Printer Size: L47 x W40 x H68 cm
Print Volume: L33 x W18.5 x H40 cm
Printer Weight: 35 kg
Photocentric Liquid Crystal Opus
System: Photocentric Studios
Operation: 7″ Touch Panel
Slicer Software: Photocentric Studios
Connectivity: USB, WiFi, Ethernet
Design: Technology Resin 3D Printer – LCD Type
Light Source: 405nm
Release Film: High Tempered Glass
XY Resolution: 81 µm
Layer Thickness: 0.025-0.10 mm
Average Printing Speed: 18mm/hr
Power Requirement: 110-230VAC;50-60Hz
System Power: Max 500 W
Printer Size: L475mm x W415mm x 605mm
Print Volume: L310mm x W174 x H220 cm
Printer Weight: 38 kg
Sonic Mini 8K S Specs
System: Phrozen OS
Operation: 3.5″ Touch Panel
Slicer Software: CHITUBOX V1.9.6 and above (or others)
Connectivity: USB
Design: Technology Resin 3D Printer – LCD Type
Light Source: Linear Projection LED Module
Release Film: FEP Film
XY Resolution: 22 µm
Layer Thickness: 0.01-0.30 mm
Average Printing Speed: 600 layers/hr
Power Requirement: AC100-240V;50-60Hz
System Power: Max 240 W
Printer Size: L47.2 x W38 x H56.6 cm
Print Volume: L33 x W18.5 x H30 cm
Printer Weight: 26 kg
After any SLA 3D print, the parts will need some post processing done before the parts can be considered complete. The post processing consists of removing any supports, washing off excess resin, and curing the part.
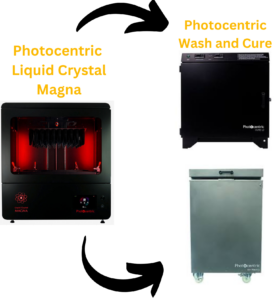
1.3 Resin Pro Package - Under 30K$
If your ready for the more advanced resin printers, Photocentric makes a great work horse for a great price. If you haven’t worked with resin in the past, first get experience with a smaller resin printer. When you perfect your part for mass production on your Magna printer, we can help with the mass production side.
The LCD Magna printers use a daylight wavelength to print parts. Resin will cure in normal light. Handling resin and parts is a little different than normal 405 UV resin.
To purchase or find more info about Photocentric go to their site at Photocentric.com
- Photocentric Liquid Crystal Magna
- Photocentric Wash and Cure
Photocentric Liquid Crystal Magna
System: Photocentric Studios
Operations: 7″ Touch Panel
Slicer Software: Photocentric Studios
Connectivity: USB, WiFi, Ethernet
Design: Technology Resin 3D Printer- LCD Type
Light Source: 465nm
Release Film: Blow Peel and Vat Lift Technology
XY Resolution: 137 µm
Layer Thickness: .025-0.35 mm
Average Printing Speed: 86mm/hr
Power Requirement: 100 VAC – 240 VAC; 50-60Hz
System Power: 500w
Printer Size: L641mm x W852mm x H900mm
Print Volume: 510 x 280 x 350mm
Printer Weight: 110Kg
The Photocentric Wash and Cure station is our recommended tools to post process prints. Some form of wash and cure is needed to achieve a good quality part.
Washing the parts removes all the excess resin from the prints.
Curing the parts is the final step to post processing.
Step #2
Material Selection and Model Preparation
We have tested these resins. They demonstrate consistent successful results. If you find a different resin in the market you want us to use for a certain purpose, please reach out. We also have many videos on these resins on our instant estimate calculator.
- Photocentric Resins
- Loctite UV/405 Resins
- BASF Resins
DL110HB-ABS/Nylon like, Black resin that can handle impact, compression but has a higher tensile strength. This is our most common material from Photocentric
Duramax-Creates functional parts that are very durable and long-lasting, with high impact strength. This has a higher toughness than most other resins.
Durable: Creates functional parts that are durable and long-lasting, with high impact strength. Most like Polypropylene with high flex and lower HDT.
DL110HTR Smokey Quartz Translucent: Has nearly identical properties as the DL110HB and DL110HW. DL110HTR has the fastest print time capabilities and a unique Amber appearance.
DL110HW: (White) has essentially identical properties as the black, though it requires more finesse.
Flexible DL220B: A newer resin with the key properties of high elongation, impact absorption, efficient energy damping, strong tear strength, and very low water absorption.
Our Recommended and Most Commonly Used Resins from Henkel Loctite
Loctite IND475: Elastomer black resin that works great for rubber like applications. Shore 48A hardness.
Loctite 3172: Allows production of functional parts that require high stiffness with a good surface finish and high impact resistance. Its attributes are similar to Polypropylene or impact like Nylon. This material is resistant to impact stress and is ideal for end use parts, manufacturing aids, housings and consumer applications and so much more
Loctite IND406: A tough rigid and durable 3D printing resin that performs well in industrial applications requiring high temperature use (100C+). The material offers all-round strength, good impact resistance, and high elongation. IND406 is a great alternative for traditional injection molded plastics such as ABS and PP. Stiffness, toughness, and thermal durability of this material makes it ideal for a wide variety of tools in the production floor and for final parts production.
BASF Ultracure3D EL 4000: it is the latest addition to our flexible and elastomeric resins.
BASF Ultraure3D EL 60: is a very versatile reactive urethane photopolymer for highly elastic applications, combining very good torsional strength and elongation at break with high softness (Shore 75 A) and low water uptake.
BASF Ultracure3D ST 45: a reactive urethane photopolymer for tough applications. It delivers an excellent combination of high strength, plus long-term toughness and impact resistance.
BASF Ultracur3D ST 1400: Clear resin wit great toughness and elongation. This is also a biocompatible resin for wearables.
BASF Ultracur3D ST 80: a reactive urethane photopolymer for tough applications.
Buy BASF Ultracur3D resins at Ultimate3dprintingstore.com
*These resins are made by Forward AM.
Step #3
Learn the Basics of Resin 3D Printing
Resin SLA (Stereolithography) 3D printing is a type of additive manufacturing technology that uses a liquid photopolymer resin as the printing material. It works by using a UV laser to selectively cure layers of resin, solidifying them into the desired shape. Many SLA printers now use an LCD screen to allow UV light to cure each layer. This process produces highly detailed and precise objects with smooth surface finishes, making it ideal for producing intricate prototypes, jewelry, and other high-resolution parts.
1: Choose the Right Resin: Select resin appropriate for your project, considering factors like color, material properties (e.g., flexibility, durability), and compatibility with your printer.
2:Level the Build Plate: Ensure the build plate is properly leveled to the resin tank to guarantee uniform layer thickness and adhesion.
3: Calibrate Settings: Adjust printer settings such as exposure time, layer height, and lifting speed according to the resin and desired print quality.
4: Use Supports: Utilize support structures in your 3D models to prevent print failures due to overhangs and ensure successful printing of intricate designs.
5: Handle Resin Safely: Wear gloves and eye protection when handling resin, and work in a well-ventilated area to minimize exposure to fumes.
6: Resin Management: Keep resin containers sealed when not in use to prevent contamination and store them away from direct sunlight to avoid premature curing.
7: Post-Processing: After printing, rinse printed objects in isopropyl alcohol (IPA) to remove excess resin, then cure them under UV light to fully solidify the resin.
8: Fine-Tune Supports: Experiment with different support structures and orientations to minimize post-processing and achieve better surface quality.
9: Monitor Prints: Regularly check prints during the process to ensure proper adhesion and address any issues such as layer shifting or failed prints promptly.
10: Learn from Failures: Embrace failures as learning opportunities and analyze the causes to improve your printing skills and optimize future prints.
YouTube is an amazing tool for finding help. Here are some searches that may help.
How to print with resin printers…
How do I level my build plate with resin…
How do I post process my resin part safely…
Resources:
Links to Printer Setup:
Photocentric Liquid Crystal Magna
Photocentric Liquid Crystal Opus
Links to Calibrating/Using The Printers:
Phrozen Sonic Mega 8K S Calibration; Phrozen Sonic Mega 8K S LCD Test
Phrozen Sonic Mini 8K S Calibration; Phrozen Sonic Mini 8K S LCD Test
Photocentric Liquid Crystal Magna
Photocentric Liquid Crystal Opus
Printing Tips:
Link to Step By Step Beginners Guide; By Teaching Tech
Link to Tips on Understanding Supports and Overhangs; By Nerdtronic
Link to Bed Adhesion Tips and Tricks; By UncleJessy
Link to Support Guide; By VogMan
Post Processing Methods:
Step #4
You Print/Prototype Your Part
Print-3D Print your part in your desired material. Test different materials and new materials that are developing.
Prototype- You do your prototyping and testing to your hearts content. Keep testing materials, designs and orientations to see what works best.
Feedback from Merit3D-When you’re ready, submit your part to us. We will evaluate your part and give you feedback on your design and mass production capability. We want you to know what you’ll get from us based upon your design.
Confirm all looks good and order a sample part– You order a sample part to verify all looks good. If you approve the outcome, we begin mass producing your part.
Additive Manufacturing allows endless model changes… and a wide variety of materials. Now, more than ever, we are focusing on delivering manufacturing happiness through a streamlined, customer-based, mass production method.
Instant Estimate Tool or Contact Form
Step #5
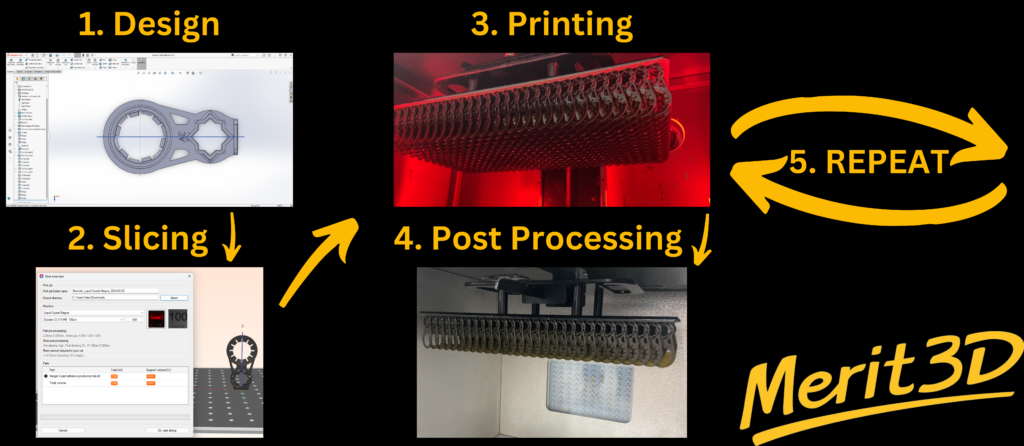
Mass Produce With Us!
After going through all the steps, either you have a finished part, or need to make some changes. In that case, just go back to step 4, touch up on step 4, and print your part again!
When you feel ready, you’ll send us your file, and we’ll send you feedback. You’ll say “just print it”. When that happens, we’ll mass produce it for you! Use our contact form or instant estimate tool to get in touch!
Need a different path?