
Resin Printing Daily Tips
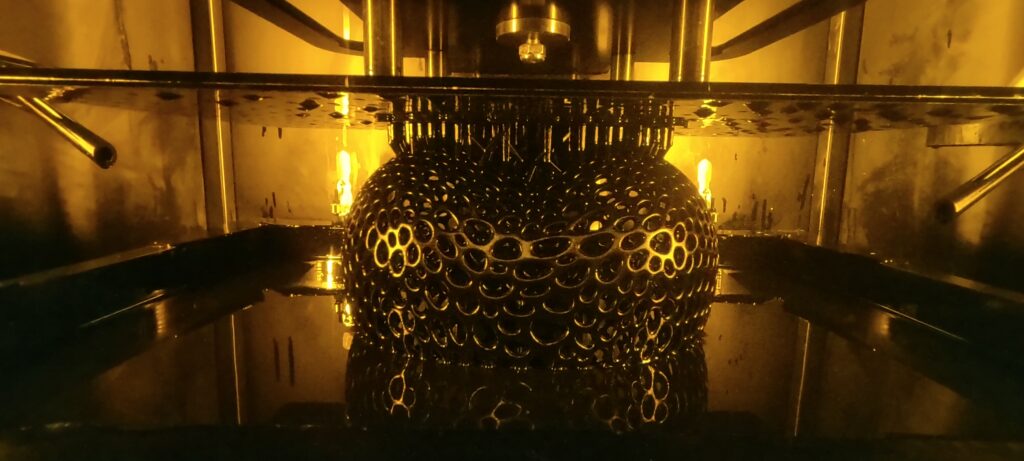
Daily Tip #1 Add drain holes when you print hollow items. You’ll avoid cupping and trapped resin. This, of course, is for resin printing, not FDM. View on YouTube
Daily Tip #2 An item that was designed for FDM printing doesn’t necessarily work for SLA LCD. For one thing, gravity weighs differently in each process: it pushes on one, it pulls on the other. View on YouTube
Daily Tip #3 Resin prints with holes don’t always turn out well. For a hole with a diameter less than 2mm, consider drilling it after printing. View on YouTube
Daily Tip #4 When using a new resin, you don’t have to figure everything out on your own. Use the TDS (Technical data sheet) for troubleshooting and parameter guidance. Be aware though that some aspects of resins “aren’t tested” by manufacturers, such as water absorption. View on YouTube.
Daily Tip #5 When slicing your resin print, change the orientation by 30-45 degrees. You change the angle to limit the tension between each layer. The greater the surface area of each layer, the more likely the layers will separate. View on YouTube
Daily Tip #6 When you use supports, consider where those supports will touch: can you have marks there? Do you want to sand them off? Can you? Or should you tilt your model differently? View on YouTube
Daily Tip #7 Drain holes also allow air to flow inside your print, which is necessary for allowing excess resin to drain away. View on YouTube
Daily Tip # 8 The strength of a print can be augmented by the wall thickness. In general, small items should have a 1mm wall, medium size items should have a 2mm wall, and large items should have a 3mm wall, but large Items may need a thicker wall depending on the orientation. View on YouTube
Daily Tip #9 If you are building a customer’s part, and they use a different post process than you can, verify that your part still meets requirements with your different post process. View on YouTube
Daily Tip #10 Solve light bleed by decreasing the exposure time. Some also add dye or pigment to their resin to make the resin more opaque. But if you are printing in a clear resin, your effort should be placed in your printer settings. View on YouTube
Daily Tip #11 The more surface area on the printer at a time the more the peeling force. Try to change the angle of your print to limit the surface area for each layer. This should prevent layer separation. If you can’t change the angle, use rafts on the outer edges. View on YouTube
Daily Tip #12 If you choose to lattice your walls, make diamonds, not squares to avoid shelves or parallel surfaces to the build plate. View on YouTube
Daily Tip #13 To solve errors in the mesh, use the mesh repair tool in the slicer or manually repair the mesh in your modeling program. Either way, review each layer or slice before printing.
Daily Tip #14 For assembled resin prints, read the data sheet for the resin you are using and adjust the shrinkage compensation tool in your slicer. Do several test prints to get your prints dialed in. Allow yourself some space between parts.
Daily Tip #15 Will your part need sanding, assembly, metal parts, special curing, milling? Consider these things when designing your part, particularly when adding supports since they leave marks.
Daily Tip #16 When slicing, tilt your faces that need to be clean up so that they won’t have support marks and won’t have to be sanded.
Daily Tip #17 Modifying imported files can be a challenge, especially when the file breaks. Sometimes it is easier to take measurements from the existing model and rebuild it with your modifications.
Daily Tip #18 Avoid shelves when orienting in SLA: surfaces that are parallel to the build plate. Shelves sag and can slide around. Orient so that the planes and lines aren’t parallel to the plate. A parallel top layer will be smooth. View on YouTube.
Daily Tip #19 Place the larger portion of your part closer to the build plate so you are printing from large to small rather than the reverse. View on YouTube.
Daily Tip #20 Make custom supports if you want to save resin. First connect them to the islands then other overhangs or edges. The lower side should be 1-3mm diameter. (3mm for the largest prints). The tips should be smaller than that. But tip size is dependent on which resin you use.
Daily Tip #21 Cupping happens mostly in hollow areas. If the area is shallow, angling the print or flipping it may be enough to prevent cupping. Add drain holes to each hollow area to further prevent cupping.
Daily Tip #22 Elephants foot is caused by the extra burn time for the initial layers. This is important for the first layers to stick to the plate. Consider adding a foot that will adjust for the additional burn time.
Daily Tip #23 Before designing the part, know the space that it has to interact with or its tolerances. Are there bolts that have to go through it? Is it part of an assembly? Plan accordingly.
Daily Tip #24 Rigid materials in SLA tend to be more accurate than flexible ones.
Daily Tip #25 The more dense the supports, the stronger the print will be, but the harder they will be to remove. Find your happy medium. A good place to start is placing the tips at a 45 degree angle to the part and use a 20-30% support density.
Daily Tip #26 Eliminate resin waste by hollowing out your part and using lattice or a grid in your design. How strong does your part have to be? Does it really have to be solid? Your answer can save you in resin costs.
Daily Tip #27 Sometimes edges curl in resin prints. The most likely solution is leveling the bed. Using rafts and angling the orientation can help too.
Daily Tip #28 If upper layers curl, move or add supports closer to the edge of the print.
Daily Tip #29 A print failed, but what caused it? Compare it to successful prints, check your print profile, make small changes, and check online boards for answers.
Daily Tip #30 To solve bed adhesion issues, first level the bed then adjust your burn layer settings. Adding rafts can help too.
Daily Tip #31 Minimize first contact warping by adding supports, changing the orientation, or sticking the print directly to the plate.
Daily Tip #32 Downward facing surfaces may need supports. If you don’t want to sand off support marks, consider reorienting your part or redesigning your part supportless.
Daily Tip #33 Link long and skinny parts together with supports, and they’ll print straight up and down. Supports should be diagonal.
Daily Tip #34 Printing threads requires trial and error. Try different thread pitches, angles and z bleeds.
Daily Tip #35 Resin prints do shrink. Prepare for it by scaling up .5 to 1 percent. You can scale in the slicer or your modeling program. Or you can adjust your cure time.
Daily Tip #36 Downward facing surfaces cannot be textured. If you need texture on a particular surface, orient it differently.
Daily Tip #37 If your printer has holes in the build plate, line up the holes with your drain holes to facilitate draining resin during the print.
Daily Tip #38 Tolerances for resin printed parts are plus or minus 125 microns. For precise parts, plan accordingly.
Daily Tip #39 Burn layers refers to several layers at the beginning of the print that are overexposed. They can solve bed adhesion issues.
Daily Tip #40 You can put too many parts on a plate. Some resins generate more heat than others and have different boiling points. Excessive heat can cause print failure.
Daily Tip #41 If you have to stay below a certain financial threshold for your part, consider the cost of post processing as well as material costs.
Daily Tip #42 There is an optimal quantity for mass production. Just because you can fit it on the plate doesn’t mean you should.
Daily Tip #43 Put a chamfer on the bottom edge of your print so a knife can easily slip under the print for removal from the bed.
Daily Tip #44 Try to avoid placing either top or bottom of your print parallel with the plate. But if you make the top parallel, make it very parallel: it will create a shiny but smooth surface.
Daily Tip #45 Texture can hide layer lines of resin prints but can accentuate defects if there is an error.
Daily Tip #46 When designing for different resins, use trial and error, plan for less detail with squishy resins, more detail with rigid resins. Make walls thicker with flexible resins. Check discussion boards about particular resins.
Daily Tip #47 Design your print without supports by rounding off edges, ensuring build plate adhesion, eliminating islands, adjusting print settings, and knowing the limitations of your resin. Also, build one part off of another and use angles smaller than 65 degrees.
Daily Tip #48 Wait for your material to cool before starting another print or your tolerances will be thrown off.
Daily Tip #49 Choosing the correct resin is part of design. Successful part implementation happens when the design and material match the application.
Daily Tip #50 If one material fails, don’t give up. Other materials may work.
Daily Tip#51 The number of parts on a plate has the biggest impact on cost for mass production. That is why larger parts cost so much: only a few can fit at one time.
Daily Tip #52 Parts the size of a grapefruit and smaller are the cheapest to mass produce for our process because we can fit more on the bed and prints succeed more often.
Daily Tip #53 Since flat surfaces tend to warp, it is good practice to put those surfaces at an angle to the bed, not parallel, and ensure you have drain holes for hollow parts.
Daily Tip #54 Resins can be colored. For example, BASF supplies a color kit for their resins.
Daily Tip #55 Don’t buy resin that doesn’t match the wavelength of your LED’s. 405 resin won’t cure with LED’s of a different wavelength.
Daily Tip #56 You can’t do infill with Resin Printing like you can with FDM. Typically you can only do hollow or solid. Sometimes you can add infill, but it is more like an inner grid of scaffolding: it has to allow draining.
Daily Tip #57 If your part will rub on any other surface, be sure that the resin is rated for it or add lubricant so it is less likely to fail.
Daily Tip #58 Before investing in a large, expensive resin printer, try printing with a smaller resin printer. Resin printing isn’t for everyone.
Daily Tip #59 If you are new to 3D printing, consider starting with filament printers (FDM) before printing in resin. They are easier to work with, don’t require wash and cure, and aren’t as toxic with regard to fumes.
Daily Tip #60 Make sure you know what chemicals you are working with before you start printing. Also, source a safe location for disposal.
Daily Tip #61 Before jumping into resin printing, learn what the entire process entails. It requires more equipment than just the printer.
Daily Tip #62 Resins vary in expense. They can be much more expensive than filament, but they typically allow more detail and they have isotropic properties.
Daily Tip #63 For faster print times in resin printing, increase the microns for the layer thickness, especially if you don’t mind layer lines.
Daily Tip # 64 Some resins do turn chalky when scratched. If that is an issue, choose a resin that doesn’t scratch or package your parts carefully before shipping.
Daily Tip #65 Post processing can affect the final properties of different parts. Test parts that have been completely post processed before mass producing.
Daily Tip #66 Resin prints can be coated or painted with many different products though there isn’t too wide a variety of resin colors to choose from. The common resin colors we use include black, amber, light blue, white, clear, and almond.
Daily Tip # 67 Adding a fillet or chamfer on corners can increase print success, but chamfers work better because they are linear.
Daily Tip #68 Add a lot or revision number to the file and the part to keep track of revisions. They can be added to the part with some slicers (we use Photocentric), Blender, or other modeling software.
Daily Tip#69 Wear PPE when handling resin and IPA. It doesn’t feel good in the eyes, on the skin, resin doesn’t come out of clothes in the laundry, and isn’t good to breathe.
Daily Tip# 70 One reason prints fail is debris between the screen and the vat and in the bottom of the vat. Keep them clean.
Daily Tip #71 Look at our pricing for your project with our instant quote tool by going to quotetool.merit3d.com
Daily Tip #72 Using small desktop resin printers isn’t very expensive, but the size of parts is limited as well as the production times for many smaller parts. Larger machines are worth the cost if used to mass produce or make very large parts.
Daily Tip #73 Putting a print flat on the plate is doable, especially if there isn’t too much surface tension, shelves, or islands. But a print should be tilted if any of those are present in a resin model.
Daily Tip #74 Buy extra vats for your resin printer. They enable you to keep printing faster when switching resins or replacing an FEP.
Daily Tip #75 Testing for longevity can be difficult with resin printing because resins haven’t been around too long, but test them anyway.
Daily Tip #76 Smaller prints tend to stay within smaller tolerances while larger prints require greater tolerances to be within specifications.
Daily Tip # 77 When a hole runs parallel to the print bed (in the XY plane) it will typically be distorted unless the z-bleed feature is used. This feature distorts the whole model.
Daily Tip #78 The z-bleed feature can be used to sharpen threads.
Daily Tip #79 To avoid the distortion in horizontal holes (XY plane holes) without using the z-bleed, tilt the model at least 15 degrees. You may want to do this to avoid the distortions that come by using z-bleed.
Daily Tip #80 Consider using another solvent other than IPA. We use a cleaner from Photocentric that isn’t flammable. Whatever you do, be safe.
Daily Tip #81 When printing functional parts, a gauge can be helpful to determine whether or not the printed part is acceptable for customers.
Daily Tip #82 After rinsing off resin, use compressed air to blow off the excess solvent or water. This eliminates spots. Fans help too.
Daily Tip #83 Learn to change your own LCD screen. They do break on occasion. It will save you time and money.
Daily Tip #84 You can add your logo directly to your part using Blender.
Daily Tip #85 If you have a cavity or other hollow structure inside a resin print, you need drain holes or channels to reach the outside of the print, otherwise trapped resin will typically soften the other parts of your print and sometime destroy or dissolve it.
Daily Tip #86 If you want to sell a medical device, you’ll need to acquire ISO 13485 certification.
Daily Tip #87 Completely hollowing a part isn’t always the answer, especially when the resin or cleaner can’t be drained. Partially hollowed parts do work, when needed.
Daily Tip #88 You don’t have to get a material that looks like metal to score that metal looking finish. You can use paint, PVD, or electroplating. (Yes you can electroplate non-conductive 3D prints).
Daily Tip #89 Avoid the holes in your plate when you print flat to the bed.
Daily Tip #90 Mass production, especially in resin printing, isn’t for anyone. If you want to mass produce in resin, master a small resin printer first.
Daily Tip #91 Using any resin is fine for decorative parts, but when printing functional parts for industry, you need to use resins from a reliable supplier. We use resins from Loctite, Photocentric, and BASF.
Daily Tip #92 Cerakote gives you a solution to the lack of colors with resin printing.
Daily Tip #93 Engineered parts with specific parameters, particularly with regard to material properties, can make use of the TDS, available from most material manufacturers.
Daily Tip #94 Add drain holes at the lowest point of the model. If you add two, you have a drain and a vent hole.
Daily Tip # 95 Problems, such as resin clogs or distortion, begin with holes with a diameter less than 2mm. The printer settings can be dialed in further but you may consider drilling the holes.
Daily Tip #96 If you plan to drill out a hole, or use a rivet with your printed part, verify that the material you use isn’t too brittle. Some resins are very brittle.
Daily Tip #97 Resins shrink. Plastics do too. The TDS can tell how much a resin shrinks. Use the shrinkage compensation in your slicer to dial in the accuracy of your prints.
Daily Tip #98 An elephant’s foot is a distortion in the layers when building directly off the build plate and/or light leaks. Consider using rafts or x-y offset adjustments to eliminate the elephant’s foot.
Daily Tip #99 On a Resin Technical Data Sheet (TDS) there is often a rating for rigidity and durability. Consider both carefully. Just because a resin is rigid, doesn’t mean it is durable. Using that resin would be like making a hammer from glass: it is rigid, but it will shatter on impact.
Daily Tip #100 Before mass producing in a select material, test how it behaves after being submerged in water, especially if your application is near water. Different resins absorb water in different quantities. Some resins aren’t affected by water. Some get absolutely destroyed.
Daily Tip #101 Don’t spend too much time manually hollowing parts for resin printing. Some slicers, like Photocentric slicer, hollow parts automatically.
Daily Tip #102 To achieve prints within a specific tolerance, compensation needs to happen in the 3D model, the print settings, or a combination of both.
Daily Tip #103 The need for compensation varies from material to material: Just because you successfully printed a part in one material doesn’t mean the settings will work in another.
Daily Tip #104 Suppliers like bulk orders. You can receive major discounts for such orders, but they have to typically be in excess of 124 KG’s at a time.
Daily Tip #105 Just because a material isn’t FDA approved doesn’t mean it won’t work for your application. There are several resins we use that have been proven “skin safe” for example.
Daily Tip #106 Placing prints right on the pixel can eliminate a pixel line. Some slicers show where the pixel is in the printer.
Daily Tip #107 Medical parts can be printed with resin, but the materials can be very expensive.
Daily Tip #108 FDA approval has to do with the material used and the process used for product creation. A material may have biocompatibility, but perhaps the process isn’t safe or the manufacturer doesn’t want to spend the money to secure and maintain FDA approval.
Daily Tip #109 You can determine the risk classification of your part in the FDA’s database here: https://www.accessdata.fda.gov/scripts/cdrh/cfdocs/cfpcd/classification.cfm
Daily Tip #110 While generic PLA is generally recognized as safe (GRAS), additives, and manufacturing processes can affect its biocompatibility.
Daily Tip #111 If a manufacturer of a printing material doesn’t provide an MSDS for that material, you can still have the material tested at a lab, but it is safer to use materials that are ISO 10993 compliant, especially when used on people or in people.
Daily Tip # 112 ISO 10993 compliance varies with some specific applications: 10993-5 Cytotoxicity 10993-10 Sensitization and Irritation 10993-11 Systemic Toxicity
Daily Tip #113 Check the MSDS from the manufacturer for specific mentions that the material is ISO 10993 compliant, especially when using for potentially dangerous applications.
Daily Tip #114 If you are having issues with your 3D file, sometimes it is quicker and easier start over.
Daily Tip #115 Materials may be skin safe or FDA approved, but the geometry (ie layer lines) may be an ideal environment for dirt and bacteria to accumulate.
Daily Tip #116 Sanding or polishing may fuse layer lines and prevent the accumulation of dirt and bacteria in a 3D print.
Daily Tip #117 Some resins can be dyed after printing, washing, and curing.
Daily Tip #118 When printing multiple parts, be carful of putting them too close together or using the same area on the bed too repetitively: the FEP will wear out prematurely.
Daily Tip #119 Some resins absorb heat better than others. This becomes important when printing multiple parts at one time.
Daily Tip #120 Required support geometry will vary by material: there isn’t a general thickness, length, penetration, or location. Test the material for optimal results and repeatability.
Daily Tip #121 ITAR (The International Traffic in Arms Regulations) has to do with manufacturing and traffic in arms. If you are manufacturing an armament of some kind, check their list to ensure that your product isn’t regulated.
Daily Tip #122 If you think your product might be subject to ITAR, you can review the munitions list here: https://www.pmddtc.state.gov/ddtc_public/ddtc_public?id=ddtc_kb_article_page&sys_id=24d528fddbfc930044f9ff621f961987
Daily Tip # 123 Having a large STL file is a good thing, especially if you want smooth geometry on curved surfaces. Smaller files aren’t as smooth, showing each individual surface that makes up the curve.
Daily Tip #124 For those manufacturing parts for Aerospace: look into AS 9100.
Daily Tip #125 AS9100 is a quality management standard for manufacturing parts for Aerospace, space, and defense. It was developed by the Society of Automotive Engineers.
Daily Tip #126 MED 3394 from Loctite has passed all 4 of the ISO 10993 tests.
Daily Tip #127 MED 3394 from Loctite can be sterilized for surgical use.
Daily Tip #128 MED 3394 from Loctite was tested to support up to 25 autoclave sterilization cycles while maintaining mechanical properties.
Daily Tip # 129 MED 9851 from Loctite is a tough yet flexible resin that can be used to make frames for glasses, adding custom options and shortening lead time for the end user.
Daily Tip # 130 IND 406 from Loctite is their “Toughest high-temp resin” having a heat deflection rating at greater than 100 degrees Celsius.
Daily Tip #131 Anti-aliasing can be used to smooth lines of 3D files before printing.
Daily Tip # 132 Solidworks has a maker’s license which only costs $40/year. It allows up to $2000 of design sales.
Daily Tip # 133 Solidworks can be used to create individual parts and assemblies.
Daily Tip #134 Solidworks is difficult and powerful, but YouTube has many tutorial videos. I recommend this series: https://www.youtube.com/watch?v=8lHEizPf-wY
Daily Tip #135 If you are selling designs made in solidworks, you’ll want a professional license.
Daily Tip #136 If you have material data, you can do simulations with your parts and assemblies in Solidworks.
Daily Tip #137 If you do simulations in Solidworks, you will need a powerful machine to process the data.
Daily Tip #138 It is usually easier to start over than it is to try to modify an STL in solidworks.
Daily Tip #139 It isn’t impossible, but it is moderately difficult to modify an STL in blender
Daily Tip #140 Blender can be used for many things. 3D modeling is one of them; exporting STL’s is another.
Daily Tip #141 In Blender, object mode is used to edit the scene. Edit mode is used to edit the mesh.
Daily Tip #142 If you are starting out in Blender, I recommend going through the doughnut tutorial by BlenderGuru: https://www.youtube.com/watch?v=4haAdmHqGOw&t=5716s
Daily Tip #143 Blender can be used for adding texture to an object.
Daily Tip #144 By using the measuring tool in Blender, you can create accurate models.
Daily Tip #145 The Boolean modifier is a powerful tool in blender. Use it to subtract or add geometry to an object using another object.
Daily Tip #146 You can use the same geometry over and over again to modify an object in blender. You only have to apply the Boolean modifier each time. You’ll also want to move the modifying geometry.
Daily Tip #147 When exporting to an STL from blender, ensure you have the desired part selected and the “Include Selection Only” box checked.
Daily Tip #148 If your Boolean modifier doesn’t work the first time in Blender, try checking the different boxes in the “Solver options”.
Daily Tip #149 If you want to shrink or enlarge a face on a rectangular prism in blender, you can draw a measurement line with the measurement tool, select the face (when in face mode), and hit “G” for grab and then drag the geometry where you need it.
Daily Tip #150 To select the entire object in blender, it is easiest to type “A”. Another way is using the wireframe viewport, then dragging the selection tool around the whole piece.
Daily Tip # 151 In Blender it is good practice to duplicate objects before making changes to them. The original object serves as a good save point, especially when the changes don’t go so well.
Daily Tip #152 If you joined objects poorly in Blender, don’t worry, you can duplicate the object and apply a remesh modifier.
Daily Tip #153 Sometimes the object file gets too big, especially for 3D printing. In Blender, you can apply a decimate modifier to eliminate surfaces from the mesh. This is especially helpful after applying a remesh modifier. You do lose definition. That’s ok sometimes.
Daily Tip #154 When applying a decimate modifier, only decimate down to 10% at a time. If you do more, it could be too much for your Computer’s CPU and you may crash your computer.
Daily Tip #155 In Blender, you can apply the decimate modifier multiple times to eliminate undesired definition from your mesh.
Daily Tip #156 If you want to do an extruded cut through and through in blender, it is easer to use the Boolean modifier with the desired shape as the negative space.
Daily Tip # 157 If you want to extrude partially through an object in Blender, use the extrude tool in edit mode.
Daily Tip #158 In Blender, you can hit X, Y, or Z to lock to a particular axis when dragging an object, line, face, or vertex.
Daily Tip #159 In Blender, the decimate modifier should only be applied after modeling is done. Further modeling is difficult afterwards.
Daily Tip #160 We also do Large Format Printing. Our print volume is 42″ x 42″ x 48″ for our Atlas Titan and 10′ x 5′ x 7′ for our Kuka Caracol.
Daily Tip #161 Our Large format printer are FDM printers that use thermoplastic pellets as their print medium. The cost of the material is therefore very affordable.
Daily TIp #162 Our large format printers use time-tested, thermoplastic materials: ABS Carbon Fiber (CF), Polycarbonate CF, Polypropylene CF.
Daily Tip#163 We are working toward printing in PETG on our Large Format FDM printers.
Daily Tip#164 There are more than 20 different 3d processes. There are 7 categories of 3D printing: Vat Polymerization, Material Jetting, Binder Jetting, Powder Bed Fusion, Material Extrusion, Sheet Lamination, and Direction Energy Deposition.
Daily Tip #165 Our materials vary greatly: flexible, rigid, white, transparent, black, impact resistant, strong, water resistant, and heat resistant.
Daily Tip #166 The longer the print, the greater the cost. Print time is determined by two thing in MSLA LCD: Layer height and Z height.
Daily Tip # 167 Lead time is affected by the complexity of the parts to be printed, the size of the part, post production required, and the material used.
Daily Tip # 168 It is easier to clean up uncured resin than cured resin. Keep your printer in a dark or UV free area so that when your FEP fails, you don’t have to chip out cured resin.
Daily Tip #169: On-demand manufacturing reduces the need for large inventory storage. It’s cost-effective and ideal for short product life cycles.
Daily Tip #170: Skipping injection molding is viable especially if your part doesn’t require tens of thousands of units or has design complexity that molds can’t accommodate.
Daily Tip #171: Mass customization through 3D printing allows you to produce multiple variations of a product without changing tooling.
Daily Tip #172: 3D printing enables localized production, helping companies avoid international tariffs and shipping delays.
Daily Tip #173: When switching from injection molding to additive manufacturing, revisit part tolerances—3D printed parts may need looser tolerances due to shrinkage or resolution.
Daily Tip #174: Resin 3D printing is excellent for low-volume production where surface finish is critical.
Daily Tip #175: You can rapidly iterate designs using 3D printing—saving weeks or months compared to tooling iterations in molding.
Daily Tip #176: 3D printing can eliminate the long lead times required to create injection molds—especially for prototypes.